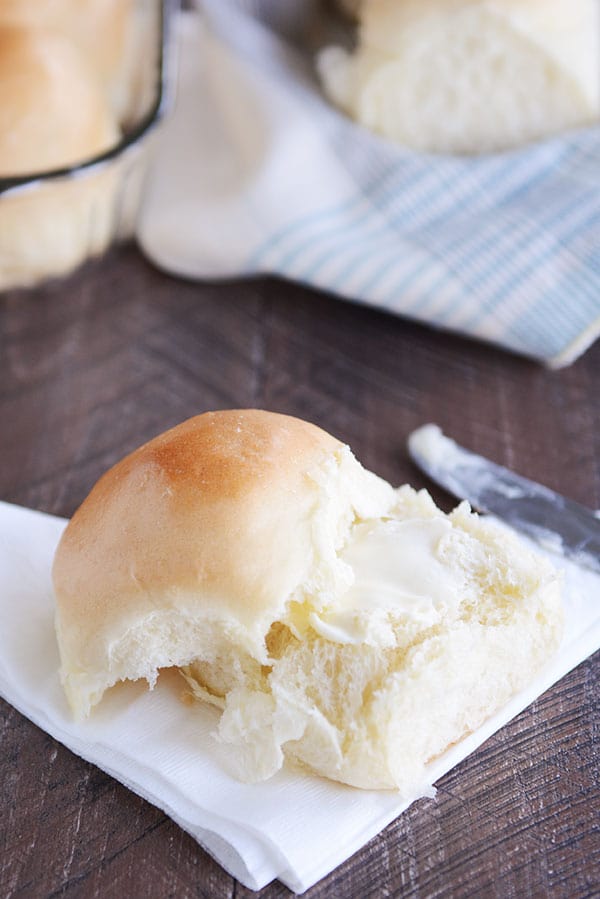
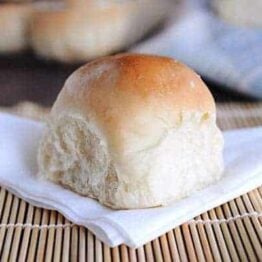
French Bread Rolls {Step-by-Step}
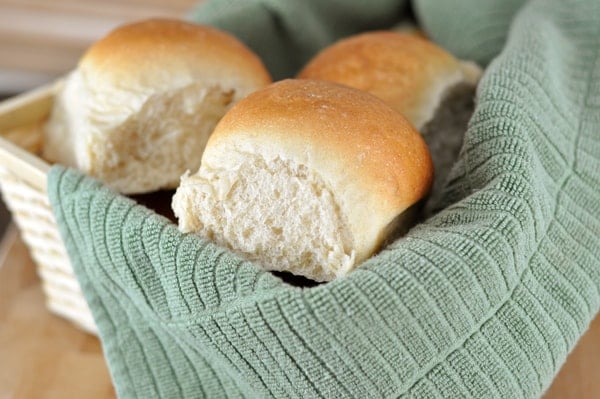
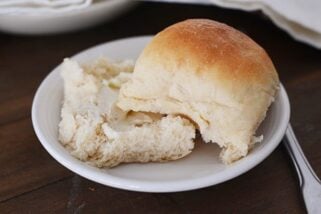
These French bread rolls make the best dinner rolls, hamburger buns, or sub buns. They are light, fluffy, and perfect for beginner (or expert) bakers. With over 1,000 5-star reviews, they are one of the most popular roll recipes on the internet.
⭐️⭐️⭐️⭐️⭐️ Thank you so much for the recipe. The rolls were wonderful. Made a double batch for Easter and froze some. They freeze excellently. Will be my go to rolls. -Jackie

Why So Many People Love This Recipe
The dough for these French bread rolls is straightforward and very forgiving. Here are many reasons why this is a foolproof, trusted recipe:
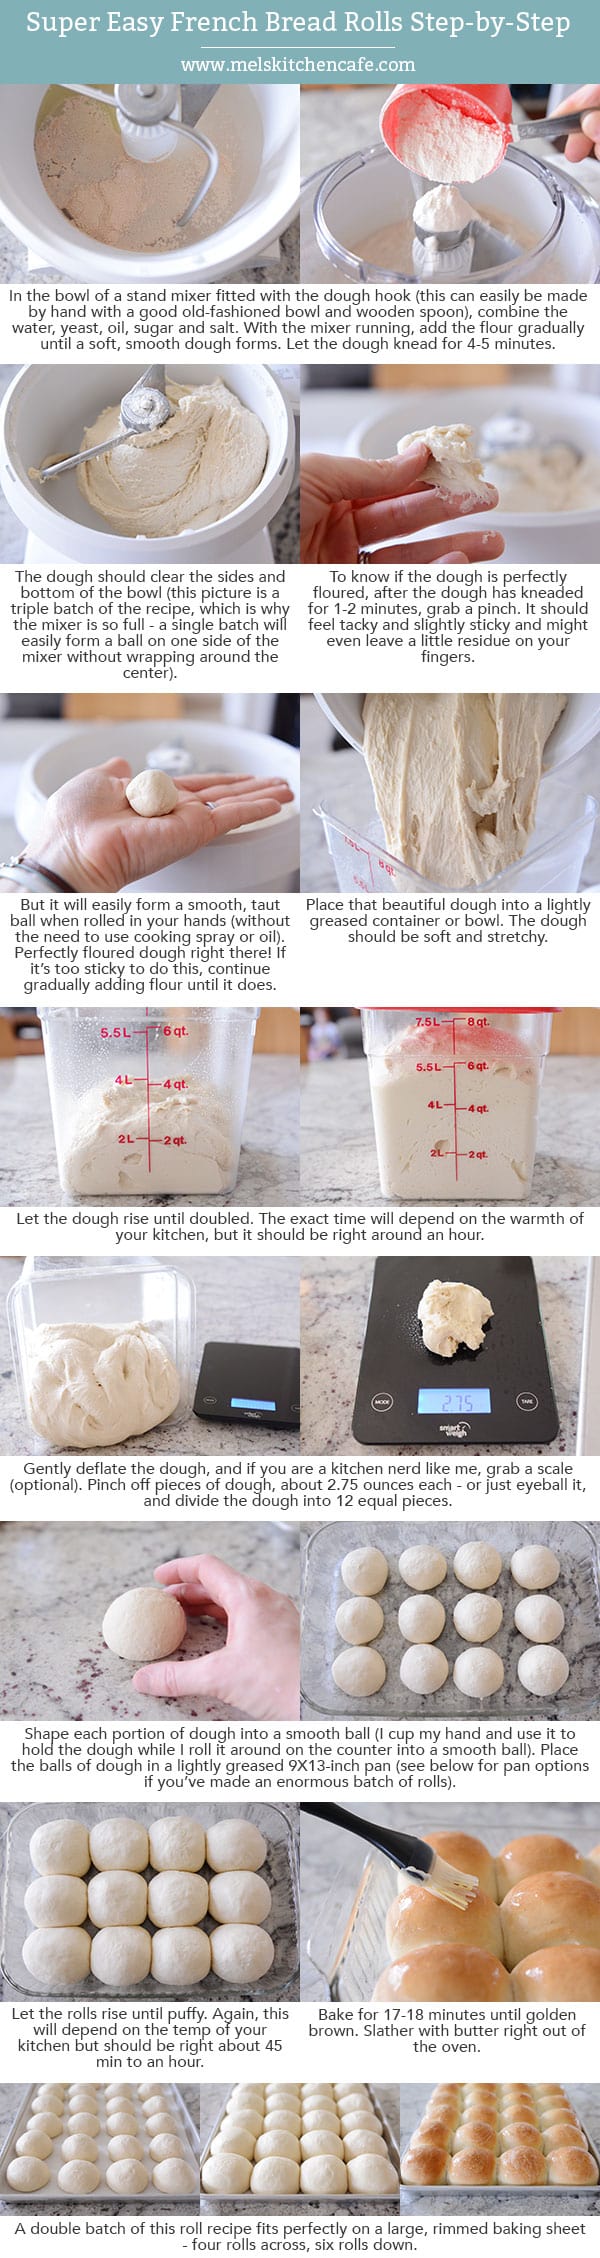
- A stand mixer fitted with the dough hook makes easy work of this recipe, however, the dough is so easy to make that it can also be mixed and kneaded by hand.
- The recipe doesn’t require scalding milk or any fussy steps. The ingredients are basic and dairy-free (other than brushing the tops of the baked rolls with butter).
- The rolls are ultra-soft and fluffy.
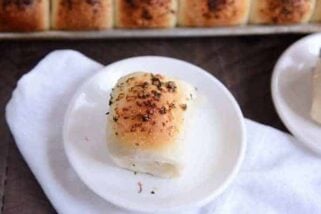
- You can shape the dough into dinner rolls, sub buns, hamburger buns – and some reviewers even report using the dough for pizza crust.
- These French bread rolls are easy enough for simple dinners and delicious enough to serve at any holiday dinner.
Ingredients Notes
- Warm water: The temperature of the water should be between 105 and 110 degrees F.
- Yeast: Both instant yeast and active dry yeast work in this recipe.
- Sugar: The small amount of sugar in these rolls helps activate the yeast and assists in the rolls rising quickly. It isn’t enough sugar to make the rolls taste overly sweet. You can dial the sugar up or down depending on your taste preferences.
- Oil: A few tablespoons of oil gives the dough a supple, smooth texture and helps the rolls taste fresh even the day after baking.
- Salt: I use table salt for this recipe.
- Flour: All-purpose or bread flour can be used – or a combination of both. Bread flour will create a chewier, fluffier roll texture. You can sub in 50% whole wheat flour for part of the white flour; if doing so, I recommend using a white whole wheat variety, which helps the dough stay light and fluffy.

Tips for Making Yeast Dough at Home
Here is the biggest tip I can give for successfully making yeast dough at home:
Stop stressing about adding the exact amount of flour called for in a recipe. Many, many factors determine how much flour is needed (elevation, humidity, how we each measure flour, etc.) Add the flour gradually and judge the dough by how it looks and feels. If you need to add a bit more flour, that’s ok!
How to test this French bread roll dough:
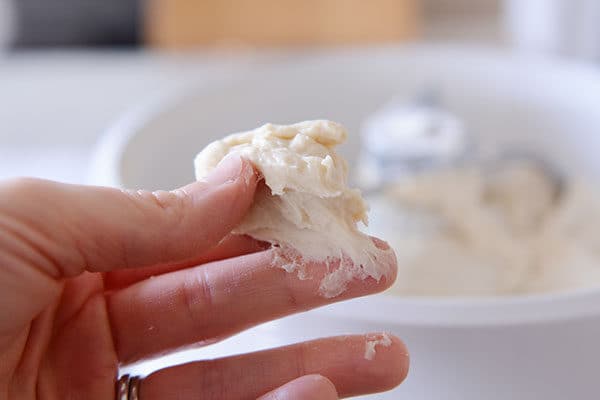
- After the flour has been added and has kneaded for a few minutes, grab a golf ball-size piece of dough.
- Initially, it might leave a little sticky residue on your fingers.
- Try rolling it into a ball without any oil or cooking spray on your hands.
- If it can form a ball shape without sticking to your hands in a shaggy, horror-movie mess, you are good to go. If not, add a bit more flour (a couple tablespoons), mix and try again.
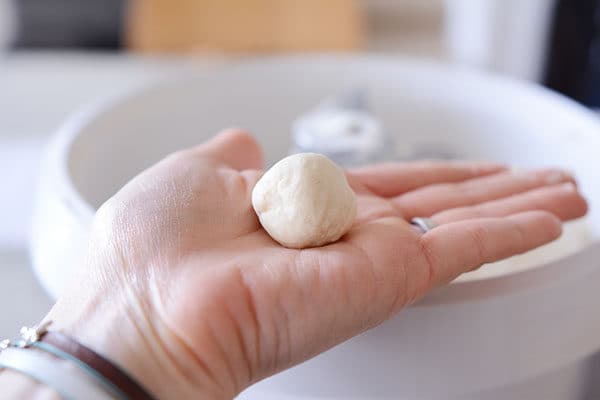
You can see from the pictures below that initially, the dough seems pretty sticky, however, it rolls just fine into a ball without a lot of sticky dough on the palm of my hand. Adding too much flour can lead to rolls that are dense and heavy, so take time to learn what a properly floured dough looks and feels like.
How to Shape French Bread Dinner Rolls
- Cut the dough into 12 equal pieces.
- I like to weigh each piece to make sure they are uniform. Each dough piece usually weighs right around 2.6 to 2.7 ounces.
- Cup your hand around the dough and roll the dough into a smooth ball, keeping the pinky side of your hand against the counter while you roll.
- Pinch the bottom to seal, if needed.
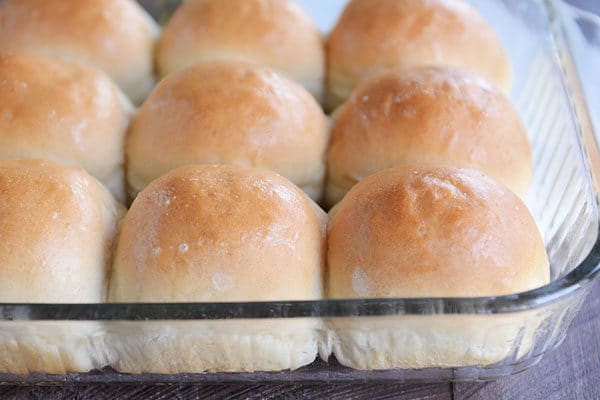
A single batch of roll dough (12 rolls) fits in a 9X13-inch pan. I almost always double this recipe and bake the rolls on a half sheet pan, which fits 24 rolls perfectly.


The Perfect Roll for Sandwiches or Subs
Over the years, these French bread rolls have become more than a dinner roll.
A quick scroll through the comments shows that many of you are using this roll dough for everything from sloppy joes to sub sandwiches.
Make-Ahead and Freezer Notes
Make-Ahead: The dough for these French bread rolls can be made and refrigerated overnight (either in bulk, or the rolls can be shaped, place on a pan, covered and refrigerated). Take the shaped rolls out of the fridge to rise fully before baking.
Freezing: The baked and cooled rolls freeze great. Place the rolls in a ziploc freezer bag, seal the bag, and place in the freezer for up to a month or so.
There is truly not an easier, more perfect roll recipe out there!
I often make these rolls for my holiday dinners – from Thanksgiving to Easter – because they are so easy, they work out every time, and they are always devoured. Plus, they make excellent leftovers!
Tools for Making French Bread Rolls at Home
*Affiliate links included below for products I’ve purchased from Amazon; feel free to shop around for the best price!*
- This is the kitchen scale I use to weigh each piece of dough.
- These containers are great for rising dough (the measurement marks make it easy to keep track of how much the dough has risen).
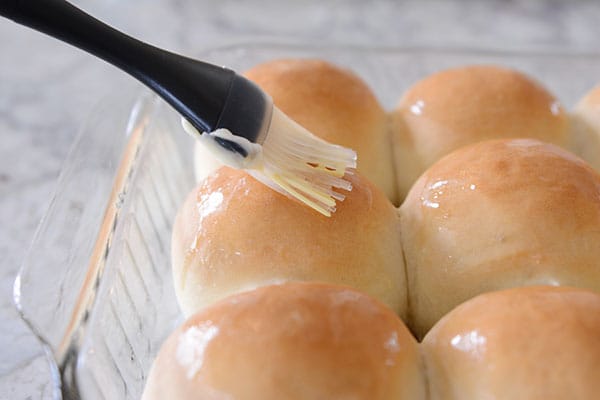
- Silicone pastry brush for brushing the rolls with butter after baking.
- My go-to OXO bench knife for portioning out the dough.
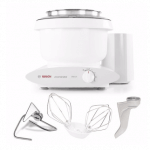
A quick note about mixers: I use a Bosch Universal stand mixer for all my bread making. Here is an older but helpful side-by-side (unsponsored) review I did between a Bosch stand mixer and a KitchenAid stand mixer.
French Bread Rolls
Ingredients
- 1 ½ cups warm water (105 to 110 degrees F)
- 1 tablespoon instant or active dry yeast (see note)
- 2 tablespoons granulated sugar or honey
- 2 tablespoons canola oil, vegetable oil, or olive oil
- 1 teaspoon table salt
- 3 ½ to 4 cups (497 to 569 g) all-purpose or bread flour, more or less (see note)
Instructions
- In the bowl of a stand mixer fitted with the dough hook or in a large bowl by hand, combine the warm water, instant yeast, sugar, oil, salt and 2 cups of the flour.
- Begin mixing, and continue to add remaining flour gradually until the dough has pulled away from the sides of the bowl.
- Knead the dough for 4 to 5 minutes in a stand mixer (7 to 9 minutes by hand). Add additionally flour a tablespoon or two at a time only if the dough starts to cling to the sides of the bowl and is really sticky to the touch (see note below for clarification).
- Place the dough in a lightly greased bowl and cover. Let the dough rise until doubled, 1 to 2 hours.
- Turn the dough out onto a lightly greased countertop.
- Divide the dough into 12 equal pieces (about 2.75 ounces each, more or less), and form the dough into round balls by cupping your hand around the dough and spinning into a round shape, pinching the bottom to seal any rough edges, if needed (video tutorial here right at minute marker 2:20).
- Place the rolls in a lightly greased 9X13-inch pan or on a lightly greased half sheet pan. Space the rolls about 1/2 to 1-inch apart.
- Cover the rolls loosely with a lightweight towel or greased plastic wrap and let the rolls rise until very puffy and nearly doubled, about 45 minutes to 1 hour.
- While the rolls rise, preheat the oven to 400 degrees F (if your oven bakes hot, preheat to 375 degrees F.) Bake for 17 to 20 minutes until golden and baked through.
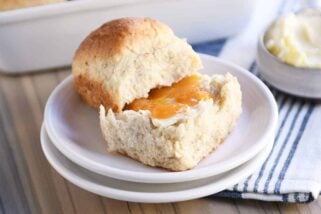
- Immediately out of the oven, brush with butter, if desired. Serve warm or at room temperature.
Notes
Recommended Products
Recipe Source: Mel’s Kitchen Cafe
Recipe originally published 12/2007; updated with new pictures, step-by-step tutorial, and recipe notes.

These turned out absolutely delicious! This has now become my favorite recipe for rolls!
Carlin – I make these rolls constantly so I am very, very glad you liked them. Thanks for letting me know!
The Three Amigos – I also sub whole wheat flour for these (at least half whole wheat, half white) and it works great, so I’m very glad you like them, too!
I love these rolls! I find they work better (rise up rather than out) when I crowd them into cake pans. A half recipe fits perfectly into one 9 inch round pan. Thanks so much for your GREAT directions!
Layton – great tip on using a cake pan and for listing how much of the dough fits in. Thanks! I’m really glad you like this recipe.
the Robinsons – I double this recipe all the time and if you are using active dry yeast, then yes, definitely double the yeast along with the other ingredients. If you are using instant yeast, you can get away with using 1 1/2 tablespoons for a doubled recipe. Hope that helps!
These rolls are so good my family loves them! I make them a lot and now everyone is requesting them for Thanksgiving. If I double the recipe, do I also double the yeast?
Molly – what a great meal for when you are working late and want dinner for your family. You are a good mom. I’m glad the rolls and Italian beef were a hit. Thanks for letting me know!
I made these with your Italian Beef Sandwiches recipe and it’s a keeper! I used my bread machine and made the rolls the day before. I put the beef in the crockpot on the morning of my longest work day. I don’t get home until 8:00 p.m. so my family was able to have a hot, simple filling dinner without much fuss. Wonderful!
Ursala – glad these were such a hit with the fam!
I made these tonight…YUMMY! Patrick ate 4 of them! 🙂
shweetpotato – so glad you liked these little beauties! Thanks for letting me know.
omgosh DELICIOUS< I just took these out of the oven and my daughter has already eaten 2 of them lol, I need to double it next time, YUMM
I made these last night! YUMMO! They were sooooo easy and quick for yeast rolls and they were really good. Ian thought they were the best rolls I ever made 🙂 Plus, there is no butter or eggs which means less points for my weight watchers! Yay!
I really really liked these rolls. I ran out of white flour and ended up using about 3/4 cup of amaranth flour but they were very tasty. I will be making this recipe again.
I made a double batch of these for our Easter dinner and they were a big hit…I will def. make these again!
I made these tonight and they were divine! Easy, quick and delicious. Thanks for sharing!
just made these tonight and am eating it now and they are divine! 🙂 thanks so much for an awesome recipe.
I made these a few days ago, and although yours look even lighter and fluffier; they’re already gone! Thanks for the recipe. 🙂
Amber – your comment made me smile. I’m sure your rolls were not ugly but next time I make these, I’ll take some pictures of how I form them and put them on the cookie sheets. Until then, the amount of dough I roll into balls is usually about golf ball size and I put three across on a standard size cookie sheet (11X17 is the size, I think). Hope that helps!
Amy and Pamela – I’m wondering if you both made these the same day since your comments came on the same day!
I’m glad you both liked the recipe.
As for the shaping issue, Amy, I pinch off a golf-ball size portion of dough and roll it on the counter while cupping the dough in the palm of my hand as I roll it – the same way you would make a ball out of play-dough. I roll it around on the counter and it forms a ball due to the palm of my hand cupping it into a round shape. I keep rolling until it is smooth. Hope that helps!
Thanks, Melanie! I actually made the dough before I was able to read your reply. When it was ready to deflate, I gently pushed on it and it, well, it deflated! I felt a little silly! Now they are all rolled and raising again! I’ve also got your Mom’s Lasagna going! I’m hungry just thinking about it!! Thanks again…you really have a great blog here!
Another roll snob here. These remind of the rolls they serve at Little America. I will be trying these soon too!
Hi! I can’t wait to make these rolls…but what does it mean to ‘deflate the dough’? I’m new to the whole bread making thing! Thanks!!
Thanks, Evelyn! I hope the rolls and lasagna turned out great for you. Don’t hesitate to let me know either way!
Anonymous – awesome job on your first attempt at bread. I’m glad you liked these! I’m not sure why they were so sweet – mine aren’t any sweeter than a normal roll when I make them. Thanks for letting me know how it went!
Bharti – thanks for letting me know you tried these! I’m on my way to check out your post…
Norah – glad you tried the rolls and liked them. I make them all the time because they are easy and delicious. I’m glad you commented so now I can check out your recipe blog, too!
I made these and have blogged about them. Thanks for posting this super easy and doable recipe!
Arundathi – thanks for commenting, especially because now I can peruse your blog of Indian cuisine – yum! I’m glad you liked these rolls, they are definitely a family favorite at my house.
Yeah I have to say that I am definitely a roll snob myself. So far I ONLY make Lion House Rolls because like you said…they are the only kind to make. But Im excited to try this recipe because frankly I like baking any kind of bread….hey if you have a good recipe for yummy fluffy bisquits I would REALLY appreciate it!
Brittany – I don’t know if I’ll get a chance to post the Lion House rolls this week but if you email me at mykitchencafe {at} gmail {dot} com then I’ll email you the recipe I have.
mmmmmm… these look delicious. Once again, your pictures make them mouthwatering and I want to go whip them up even though it is 1 am in the morning! 🙂
Thanks for this recipe! I’m having it for dinner tonight! You have such amazing recipes that I’ve come to love! Thanks for sharing!
Matt in Overlook – thanks for letting me know you tried these rolls and liked them! I’m glad to hear it.
I would love to try these for Thanksgiving- but also, since I don’t have the Lion House rolls recipe- could you post it? Those are so good!
Hi Evelyn – thanks for your comment. Deflating the dough means to press it down gently after it has risen to press the air out of it and get it ready to shape into rolls. Hope that helps! Let me know if you have any other questions.
Sook – I hope these turned out ok for you! It’s fun to check your blog, too. Your recipes all look so wonderful!
I love that every time I want to bug you for a recipe- I can usually find it on here. Those rolls were delicious, especially for ham sandwiches the next day. Thanks! Do you still have ham left over? We are going to put ours on homemade pizza this weekend.
Okay, I made these for Easter Dinner and although I doubled the recipe people were still looking for more. They were amazingly good! But they were ugly. I’m not capable of making rolls look like in your picture. Can you do a post showing the size of balled dough and how close together you put them and what they look like in the pan before you put them in the oven? Help a girl out please?
I’ve made these rolls a couple times too, and they taste great, but I also am having a hard time getting the shape/look right. I am good to the point of the dough having risen the first time and them punching it down. But what is the best way to shape the rolls? Do you just roll them in your hands, or kind of pull and tuck under. I know this sounds kind of dumb, but I really want mine to be pretty like yours! 🙂
I made these rolls today. My house smelled wonderful through the whole process– there’s something so special about baking bread.
When they came out of the oven, they were oddly sweet. I’m not sure why this was.
Next time I’d follow the instructions to make them a little more crisp.
Over all, for my first attempt at making bread, I think they turned out pretty good.
I made these yesterday and they were delicious! Thank you! They did turn out a bit flatter than I thought they’d be. The bottoms also started burning with about 5 minutes to go on the baking time. Maybe my oven is hotter than it should be?
Kids first day back at school and I am going to surprise everyone with these yummy sounding fresh rolls…I love this blog and have always had great success with your recipes- Thank You!
Sunshine – what a good mom you are!! I hope they love the french bread rolls. Thanks for your comment – I’m glad you’ve enjoyed some of the recipes. (Let me know if you find those club crackers for the Caramel Crunch Bars!)
hey! i ike your recipes- and i love bread, however, i do not have an oven and therefore can’t bake any 🙁 i have a toaster oven though! any recipes for those?! 😀
Hi Jess – if the bottoms of the rolls were browning too much, you may try baking them less time (or reducing the oven temperature by 25 degrees). I’m glad you still liked them though. Thanks for letting me know!
I make these for any funeral or occasion when I don’t know for sure if there are allergies. They go like hotcakes! yum-O. It’s the first roll reciepe I have ever gotten to come out light and fluffy. Thanks!
Hi Mel,
I hope you are doing well! I just wanted to let you know that I still love this recipe so much and use it all the time. I didn’t realize until the other day when I had to write down the measurements again just how much I’ve changed the way I make them from the original – I just wanted to let you know and share the link to my post about them.
Holly
http://phemomenon.blogspot.com/2009/09/1-bowl-1-hour-perfect-dinner-rolls.html
Jillian – these are great rolls for allergy concerns since there are no milk and eggs. Glad they turned out so well!