French Bread Rolls {Step-by-Step}
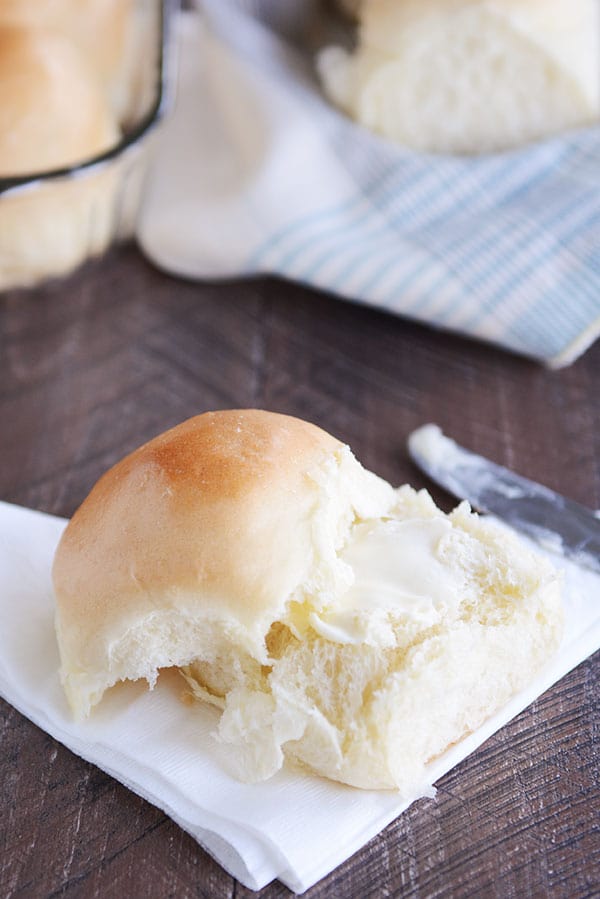
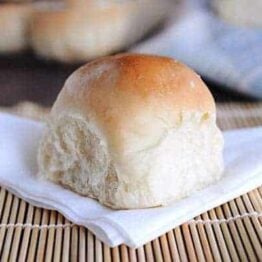
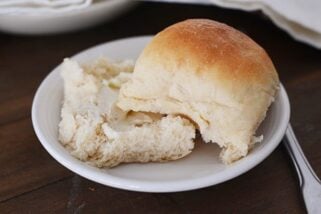
These French bread rolls make the best dinner rolls, hamburger buns, or sub buns. They are light, fluffy, and perfect for beginner (or expert) bakers. With over 1,000 5-star reviews, they are one of the most popular roll recipes on the internet.
⭐️⭐️⭐️⭐️⭐️ Thank you so much for the recipe. The rolls were wonderful. Made a double batch for Easter and froze some. They freeze excellently. Will be my go to rolls. -Jackie

Why So Many People Love This Recipe
The dough for these French bread rolls is straightforward and very forgiving. Here are many reasons why this is a foolproof, trusted recipe:
- A stand mixer fitted with the dough hook makes easy work of this recipe, however, the dough is so easy to make that it can also be mixed and kneaded by hand.
- The recipe doesn’t require scalding milk or any fussy steps. The ingredients are basic and dairy-free (other than brushing the tops of the baked rolls with butter).
- The rolls are ultra-soft and fluffy.
- You can shape the dough into dinner rolls, sub buns, hamburger buns – and some reviewers even report using the dough for pizza crust.
- These French bread rolls are easy enough for simple dinners and delicious enough to serve at any holiday dinner.
Ingredients Notes
- Warm water: The temperature of the water should be between 105 and 110 degrees F.
- Yeast: Both instant yeast and active dry yeast work in this recipe.
- Sugar: The small amount of sugar in these rolls helps activate the yeast and assists in the rolls rising quickly. It isn’t enough sugar to make the rolls taste overly sweet. You can dial the sugar up or down depending on your taste preferences.
- Oil: A few tablespoons of oil gives the dough a supple, smooth texture and helps the rolls taste fresh even the day after baking.
- Salt: I use table salt for this recipe.
- Flour: All-purpose or bread flour can be used – or a combination of both. Bread flour will create a chewier, fluffier roll texture. You can sub in 50% whole wheat flour for part of the white flour; if doing so, I recommend using a white whole wheat variety, which helps the dough stay light and fluffy.

Tips for Making Yeast Dough at Home
Here is the biggest tip I can give for successfully making yeast dough at home:
Stop stressing about adding the exact amount of flour called for in a recipe. Many, many factors determine how much flour is needed (elevation, humidity, how we each measure flour, etc.) Add the flour gradually and judge the dough by how it looks and feels. If you need to add a bit more flour, that’s ok!
How to test this French bread roll dough:
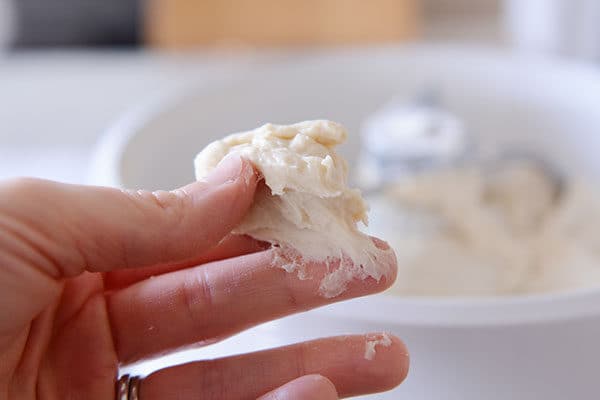
- After the flour has been added and has kneaded for a few minutes, grab a golf ball-size piece of dough.
- Initially, it might leave a little sticky residue on your fingers.
- Try rolling it into a ball without any oil or cooking spray on your hands.
- If it can form a ball shape without sticking to your hands in a shaggy, horror-movie mess, you are good to go. If not, add a bit more flour (a couple tablespoons), mix and try again.
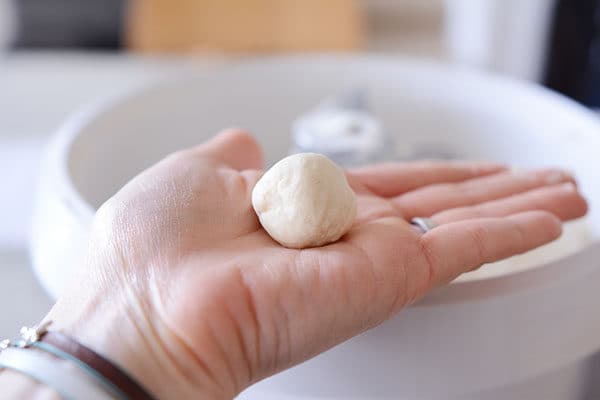
You can see from the pictures below that initially, the dough seems pretty sticky, however, it rolls just fine into a ball without a lot of sticky dough on the palm of my hand. Adding too much flour can lead to rolls that are dense and heavy, so take time to learn what a properly floured dough looks and feels like.
How to Shape French Bread Dinner Rolls
- Cut the dough into 12 equal pieces.
- I like to weigh each piece to make sure they are uniform. Each dough piece usually weighs right around 2.6 to 2.7 ounces.
- Cup your hand around the dough and roll the dough into a smooth ball, keeping the pinky side of your hand against the counter while you roll.
- Pinch the bottom to seal, if needed.
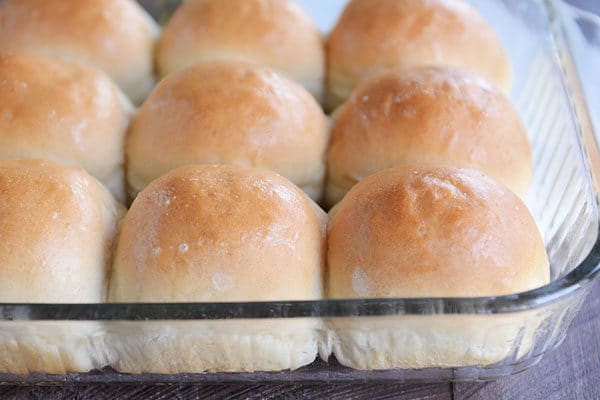
A single batch of roll dough (12 rolls) fits in a 9X13-inch pan. I almost always double this recipe and bake the rolls on a half sheet pan, which fits 24 rolls perfectly.


The Perfect Roll for Sandwiches or Subs
Over the years, these French bread rolls have become more than a dinner roll.
A quick scroll through the comments shows that many of you are using this roll dough for everything from sloppy joes to sub sandwiches.
Make-Ahead and Freezer Notes
Make-Ahead: The dough for these French bread rolls can be made and refrigerated overnight (either in bulk, or the rolls can be shaped, place on a pan, covered and refrigerated). Take the shaped rolls out of the fridge to rise fully before baking.
Freezing: The baked and cooled rolls freeze great. Place the rolls in a ziploc freezer bag, seal the bag, and place in the freezer for up to a month or so.
There is truly not an easier, more perfect roll recipe out there!
I often make these rolls for my holiday dinners – from Thanksgiving to Easter – because they are so easy, they work out every time, and they are always devoured. Plus, they make excellent leftovers!
Tools for Making French Bread Rolls at Home
*Affiliate links included below for products I’ve purchased from Amazon; feel free to shop around for the best price!*
- This is the kitchen scale I use to weigh each piece of dough.
- These containers are great for rising dough (the measurement marks make it easy to keep track of how much the dough has risen).
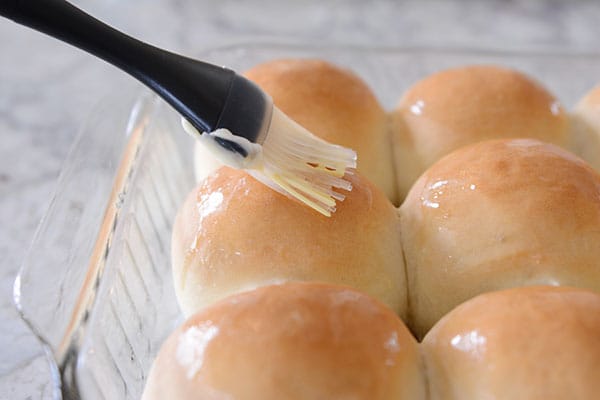
- Silicone pastry brush for brushing the rolls with butter after baking.
- My go-to OXO bench knife for portioning out the dough.
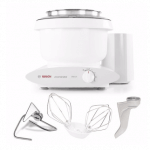
A quick note about mixers: I use a Bosch Universal stand mixer for all my bread making. Here is an older but helpful side-by-side (unsponsored) review I did between a Bosch stand mixer and a KitchenAid stand mixer.
French Bread Rolls
Ingredients
- 1 ½ cups warm water (105 to 110 degrees F)
- 1 tablespoon instant or active dry yeast (see note)
- 2 tablespoons granulated sugar or honey
- 2 tablespoons canola oil, vegetable oil, or olive oil
- 1 teaspoon table salt
- 3 ½ to 4 cups (497 to 569 g) all-purpose or bread flour, more or less (see note)
Instructions
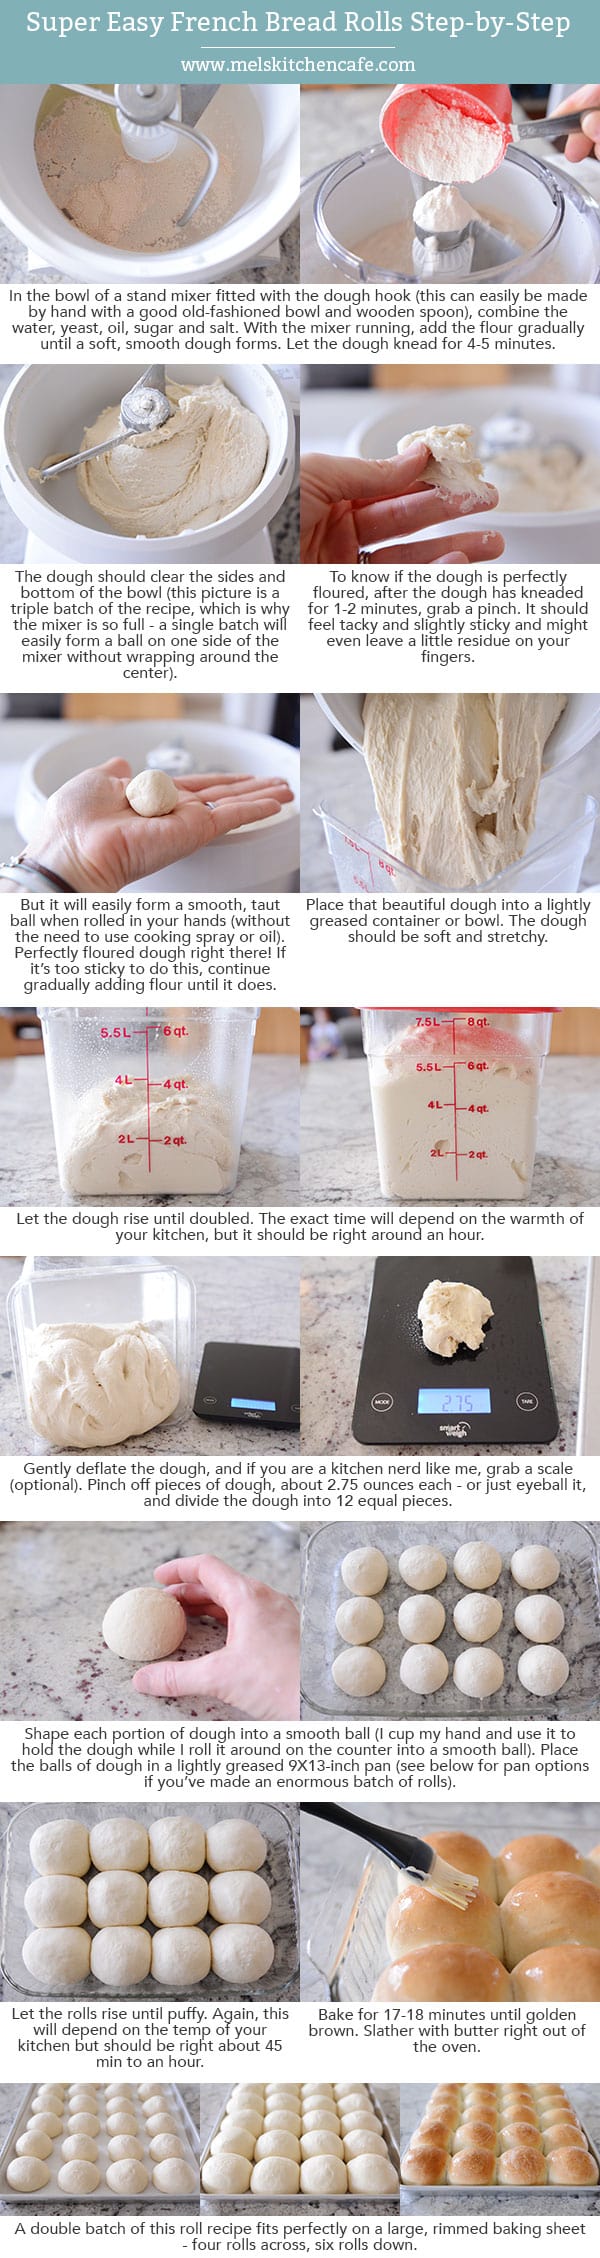
- In the bowl of a stand mixer fitted with the dough hook or in a large bowl by hand, combine the warm water, instant yeast, sugar, oil, salt and 2 cups of the flour.
- Begin mixing, and continue to add remaining flour gradually until the dough has pulled away from the sides of the bowl.
- Knead the dough for 4 to 5 minutes in a stand mixer (7 to 9 minutes by hand). Add additionally flour a tablespoon or two at a time only if the dough starts to cling to the sides of the bowl and is really sticky to the touch (see note below for clarification).
- Place the dough in a lightly greased bowl and cover. Let the dough rise until doubled, 1 to 2 hours.
- Turn the dough out onto a lightly greased countertop.
- Divide the dough into 12 equal pieces (about 2.75 ounces each, more or less), and form the dough into round balls by cupping your hand around the dough and spinning into a round shape, pinching the bottom to seal any rough edges, if needed (video tutorial here right at minute marker 2:20).
- Place the rolls in a lightly greased 9X13-inch pan or on a lightly greased half sheet pan. Space the rolls about 1/2 to 1-inch apart.
- Cover the rolls loosely with a lightweight towel or greased plastic wrap and let the rolls rise until very puffy and nearly doubled, about 45 minutes to 1 hour.
- While the rolls rise, preheat the oven to 400 degrees F (if your oven bakes hot, preheat to 375 degrees F.) Bake for 17 to 20 minutes until golden and baked through.
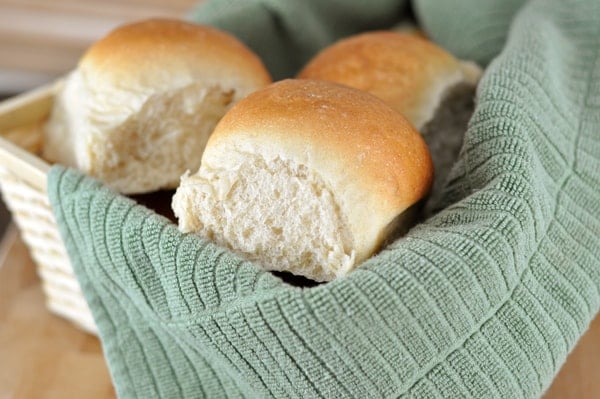
- Immediately out of the oven, brush with butter, if desired. Serve warm or at room temperature.
Notes
Recommended Products
Recipe Source: Mel’s Kitchen Cafe
Recipe originally published 12/2007; updated with new pictures, step-by-step tutorial, and recipe notes.

Hey there! A quick (possibly silly) question. I made a single batch and the rolls came out great. I would like to make a double batch, but I’m afraid of doubling ingredients as that usually results in my bake not coming out quite right. When you double a batch do you exactly double everything (yeast, water, etc.).
Yes, I double all the ingredients when I double this recipe (for a triple batch, I only double the yeast).
Hey Mel! If I wanted to make these into bread bowls, what weight of each roll would you roll them into?
I usually use about 7 or 8 ounces per bread bowl.
WOW!!!!! First time ever baking buns and I am impressed, keeping this recipe. My first attempt was a bit disappointing as the top deflated for some unknown reason (left it out for too long) wasn’t satisfied and wanted to see where I went wrong, added an extra 1/2 cup of flour and reduced resting time for the second part to 30 mins, voila!!!! It now looked liked the buns in the picture with that golden crusty top. A fool proof recipe indeed. Cheers
I want to serve these at a buffet as individual rolls so that people aren’t pulling apart. Can I place further apart on a sheet so that they don’t touch, wondering how this would change the result. Or is it better to bake as shown then have to pull apart and put in basket before I serve? Any thoughts on this?
Also, re: salt you mentioned in a response that you have used kosher salt on occasion and they were saltier, I thought the table salt would be saltier, as I was going to use table salt for the “saltier” version. Can you please clarify this.
Thank you for your insight.
Hi Denise, I would bake them close together and pull them apart and place in a basket or on a try to serve. It helps them rise nice and tall to be placed a little closer together. I think that salt comment was from a while ago – either way, you are right, table salt is usually saltier than using coarse, kosher salt (I think the kosher salt I was referring to was super fine).
These are the best and easiest buns I have ever made. My grandson can not have eggs or milk so these work great. Thanks for the recipe.
These are the best and easiest buns I have ever made.
These are easily the best rolls I’ve made, and I’ve made a lot of bread recipes in the quest for the perfect one! Light and fluffy is the best description. I’m going to see if I can find a way to incorporate a bit more salt in for flavour, without messing up the rising, but that’s a personal taste thing – overall you can’t find a better recipe. I ended up using just shy of 4 cups of plain old Costco all-purpose flour and the dough hook on the KitchenAid. 15 minutes was just about perfect for my oven. Thanks for this, it’s definitely a keeper!!!
I just finished making my first. Batch of these rolls. The ingredients are similar to breads I’ve had success with before (I just bombed on a different roll recipe tonight so we are having biscuits and gravy for brealfast. Lol.) I put these in and even before I saw how nicely they were baking, I knew these were going to be a new favorite. I don’t have a scale so I just eyeballed it and they turned out slightly different but not much like most of my previous endeavors. I also want to say a BIG thank you for the video on how to shape them!!!! Best thing in my baking life so far!!! Its nearly 2 am and I’m starting my second batch with the hopes that I don’t bomb anything else for dinner tomorrow. We have some people I’ve never met coming for dinner so I am nervous.
Hi! Do you have any suggestions for converting a bread/roll recipe to make a low carb or keto friendly product. So far I have tried several recipex and the ingredients lists are crazy..besides the almond flour they call for things like vital wheat gluten, oat fiber or coconut flour, xantham gum,. Any experience with alternate flours and ingredients?
I’m sorry, I don’t know!
These came out looking and smelling great. Going to fill them with pulled pork that’s been on the charcoal bbq all day and some home made bbq sauce. Looking forward to dinner
I am wanting to make these the night before Thanksgiving. I saw the instructions to shape them into rolls and then cover and refrigerate, but how long does it take for them to thaw/rise when you take them out the next day? Do you have to do anything specific to get them to rise after being in the refrigerator? Thanks!
When you take them out of the refrigerator, they’ll just need to come to room temp (mostly) and continue rising if they didn’t rise enough in the refrigerator. So just judge the look of them when they come out of the refrigerator.
Thank you very much.it was my first time to make this bread and it came out perfect!!! I love French bread rolls since I was a kid so when I saw your recipe I did not have any second thought to make and the outcome was extremely Amazing!!! Yummylicious!!!! Buenísimo
I make bread and rolls all the time and tried these today and they did not turn out like yours. I was so bummed! I didn’t over flour but they didn’t rise as nicely as yours and didn’t brown, just stayed white. Any suggestions? I usually don’t bomb rolls.
The color can be related the oven rack position – I find my rolls brown better right above the middle position (so higher up in the oven). If they didn’t rise, it sounds like they might need a touch more flour (if the dough was sticky).
Mel, thank you so much!! I don’t have a mixer so I made these rolls by hand. Followed your recipe with images/video and these rolls were EASY to make! That is saying a lot because I have attempted many, many, many times to make rolls with NO success! Easy to make and delicious to eat!! Thank you!!!
I’m so proud of you! Way to go!
They look so heavenly. Does anyone know if the recipe can be converted for a bread machine? Thanks.
I made these using the dough setting on my bread machine, then punched down the dough and shaped it into balls for the final rise. Worked great!
Absolutely loved this (and all of your) recipes! I baked the rolls in novelty Halloween pans (skull, tombstone shapes) and they came out perfectly. I can’t wait to try them the “correct” way also. Definitely a recipe to save!
Would it be okay if I lightly sprayed the rolls and covered with a towel for the second rise instead of plastic wrap? I always have unfavorable results with plastic wrap.
Yes! I mostly use large white tea towels these days for rising rolls and bread and it works great.
I made these yesterday. First bread make in years and this made a champ of me. I had a happy family for dinner.
Thank you so much.
This is my favorite recipe and I’m craving it. I got all excited and started getting all of my ingredients together and realized that I dont have anymore oil. I have crisco though. Can I use that?
Do you have butter? I’d probably recommend using melted butter over crisco.
I have regular Betty Crocker spreadable butter in a tub. Will that work?
It might…I haven’t tried melting that kind of butter. Might be a little oily, but worth a try.
I made these for the first time. I am NOT A BAKER but have been wanting to bake these for years. I almost shed a tear they came out so good. I would rate it a 10 if I could. Thank you. Thank you. Thank you.
Way to go, Tracey!
Hi Mel.. Can I use a breadmaker for dough instead of a stand mixer?
TQ!
Alice
I don’t have a bread maker so I don’t know for sure but as long as the quantity of ingredients fits in the bread machine, it should work.
Ohhh just made these first attempt and they are perfect! Thank you so much! x
I have made this recipe weekly for the past four years. These buns are so good that my family is horrified if they find store bought buns in our house I have a question that has me stumped and was wondering if you could help. About every 10th time I make these, as they are rising they get a giant weird air bubble in them. If left alone they bake with that air bubble and not only do they look ridiculous but when I cut them they are full of air. If I pop the air bubble the bun deflates. I always follow your recipe to a T. I always used KA flour. My pans are the same ones shown in your picture and I use my scale to measure the dough. I also make pizza dough weekly and cinnamon rolls as often as I can so I think I know what the dough should feel like. I think I have it narrowed down to either the rising process or possibly under flouring. I’m frustrated because I can’t figure out where I’m going wrong. If I didn’t make these so often I’d chalk it up to inexperience but this has become my signature recipe and most often they turn out so perfect. Any suggestions?
Hi Nancy – I’ve had that happen a time or two as well and I’m nearly certain it’s when I’ve made a batch where I’ve added just a bit less flour than other times. That’s the only thing I can identify. If I notice the air bubbles when they rise, I reroll them and they rise again without the air bubble. If you stumble on another reason you think it might be happening, let me know!
Could you share the weighted measurements for this recipe?
I don’t include weighted measures most of the time for yeasted bread recipes like this because the exact amount of flour will differ from person to person (that’s the nature of making bread) – but generally speaking, I use about 17 ounces of flour when I make a batch. That may change based on a different elevation, humidity, exact water temp, etc.
Can I make this recipe in my bread machine?
I don’t have a bread machine so I don’t know if the quantity of ingredients will fit – if it does, it should work.
Made these today and they turned out just like in the picture and lovely, very easy to make. Everyone at home loved them so will be making more of these now, thanks for the recipe
I made these rolls a few weeks ago and for the first time in my life, a batch of rolls turned out perfectly. I doubled the recipe and put half in a 9×13 glass pan and half on a cookie sheet and the ones in the 9×13 were PERFECT. I loved how they were smooshed together–it’s like it kept some of the moisture trapped in. I was SO happy. Thank you, Mel!!
But now I have a question for you: does the trick where you roll the dough into a ball in your ungreased hands work for other yeast breads, like breadsticks, pizza dough, other roll recipes, cinnamon rolls, etc? Is that a good rule of thumb for perfectly floured dough? Thanks!
Yes! I use that rolling method for any dough that is floured enough that it isn’t super sticky. 🙂
I still make these all the time! I try other recipes once in a while, but always go back to these because they are the easiest and taste the best. I always double the recipe because I think they turn out better on a cookie sheet. I weigh each roll before rolling out. I use parchment paper. I use avocado oil for the oil. I use 3 cups of bread flour, and 4 cups of all purpose flour. I cook them for 16 minutes, and brush with kerrygold butter at the end. They turn out amazing every single time. My rolls are famous in these parts! I always feel like a champ when these are pulled out of the oven even though I’ve made them a million times! You’re the best Mel!♥️
I’m not the best cook let alone baking. It took me 3 tries then I eventually got it right only because I didn’t read the recipe through properly, but I loved it every single time. The recipe is simple and now I can do it without looking at the print out
Great job, Florence!
It’s a bun, not a roll!
Hi there.
My dough didn’t rise 🙁 I used instant yeast and followed the recipe perfectly. I must have messed up somewhere, but they came out surprisingly good for my first time making these 😀
Thank you for the recipe!
This is only the second time in my life that I’ve had a successful bake. I used brown bread flour, it all came out perfectly. Light, fluffy rolls with an amazing chew,. Thank you so much for this recipe
I will try this recepie.
I’m curious why you don’t use bread flour? Are you making the recipe more accessible to those who wouldn’t have it on hand, or do you prefer All-purpose for these?
I rarely keep bread flour on hand, so I use all-purpose most of the time in bread recipes; however, you could definitely sub in bread flour for this recipe.
Will bread flour make the dough difficult to work with?
Considering it high gluten content…..
Bread flour works great!
I love your bread recipes, I made them a tad bigger and made grilled chicken sandwiches!!! Amazing!
Your rolls look perfect , any chance of getting the ingredients in pounds &ounces please I am not familiar with American measures i.e. cups ,wouldn’t know what size cup to use . Thank you ,
Dorothy Liverpool England . Love your blog !
Dorothy I’m too in the UK . i just used a small cup for mine I suppose it won’t matter what size as long as it’s the same all through the recipe . I have found a conversion in a book and this morning im trying it weighing my flour etc out . 3 cups flour is 1 LB . 1.1/2 cups water is 350 ml or 12 fl oz hope this helps . Oven temperature 400 is 200 electric and 6 gas
A cup is a specific measure, you can buy a set of cup measures from the local supermarket, asda tesco etc, you need to make sure you have the right size as the teaspoon and tablespoons are in correlation to the cups if that makes sense
First time a success. Many thanks. I make a dozen buns and had them with our roast lamb. Much appreciated by all.
This is an amazing recipe! Complete success. I had a go making bread rolls a while ago using a different recipe, the rolls were more like large rocks. I made a half batch of this recipe to avoid disappointment (I was expecting another disaster)…..I’ll be baking these rolls again. Thank you for sharing the recipe.
So good! Thankyou for recipe!
I do have a question? Should you remove rolls from tray/dish immediately? Or leave to cool first. I took out pretty quick but the did stick a bit…. Other than that they are perfect!
I’ve done both – sometimes if they cool in the pan, they can get a little soggy on the bottom so if I am on top of it, I like to take them off the tray about 15-20 minutes after they come out of the oven.
I love these rolls. I usually use two cups of wheat and the rest white flour, and they are perfect. As a side note, if you kill your yeast somehow, meaning the dough won’t double in size, this works great rolled out and made into pizza instead. I did this the other day when my rolls wouldn’t rise (pretty sure it was my mistake somewhere, not the recipe, since I’ve successfully made them before), and I was surprised by how good it was.
They turned out so yummy!!! Thank you for sharing this recipe. Taste like they were picked up fresh from a bakery. Hubby loves them.
really good recipe i use only 1 teaspoon of sugar Makes .lovely soft crunchy bread . i also add cheese and onion after first step .thank you for great
recipe
This recipe was so simple to follow and made the most perfect buns. I will be making these again. Thank you so much for sharing the recipe.
I just made these to go with some soup and they are so good! The “crust” is super flakey without the inside being dry!
Made these twice and they turned out great both times.
Can you use this dough to braid the bread, or make it into a french bread loaf instead of rolls?
Yep!
First time making buns and only my second time using my new mixer. Made bread the first time …. epic fail but these were delish and perfect. This recipe has renewed my interest.Naggie
These are the BEST white bread rolls I have ever made. Thank you so much Mel! Finally bread rolls that feel and look like they’ve straight from the bakery. These are now my go-to bread rolls. My family absolutely loves them. It’s hard to resist when they’ve come out of the oven! Delicious, soft and fluffy. I make the dough in the bread machine, then take out and form the bread rolls and leave them to rise for an hour. Perfect!
Mel, I love this recipe. When you use it to make sliders, what is the weight of each roll?
For sliders, I use about 2-2.25 ounces per roll.
Can I use butter instead of oil?
Could definitely try melted butter!
I avoid making bread as it’s always too dense, not risen, just yuck!
Gave this a try today, was in a rush so ended up just chucking everything in a bowl and hoping for the best? Flour wise my dough felt ok with 3.5 cups
Didn’t quite get 12, mine will be the little one, but VERY impressed if I say so myself….now doing a celery soup to dunk!
Thank you for sharing
I am in absolute bliss! I now know why you had tears! I did too! No more hockey pucks for this woman! Can not wait to show these off at the next family event!!! WOO HOO! Thank you!!!
I used 1cup of water and half a cup of milk… came out perfect better than the first time i tried them with just water
Hi Mel!
I have made these several times and they always turn out great! Do you think they could be formed and put in a pan, refridgerated overnight and baked the next day?
Yes, for sure! Just take them out of the fridge in time to take the chill off and finish rising if they need it.